How to Use Conference Call Controls
Last updated: March 14, 2026
How to Use Conference Call Controls
Overview
Conference Call Controls is one of three options in Videosync for controlling a teleconference. You can access all three options from Event Admin → Live → Teleconference:
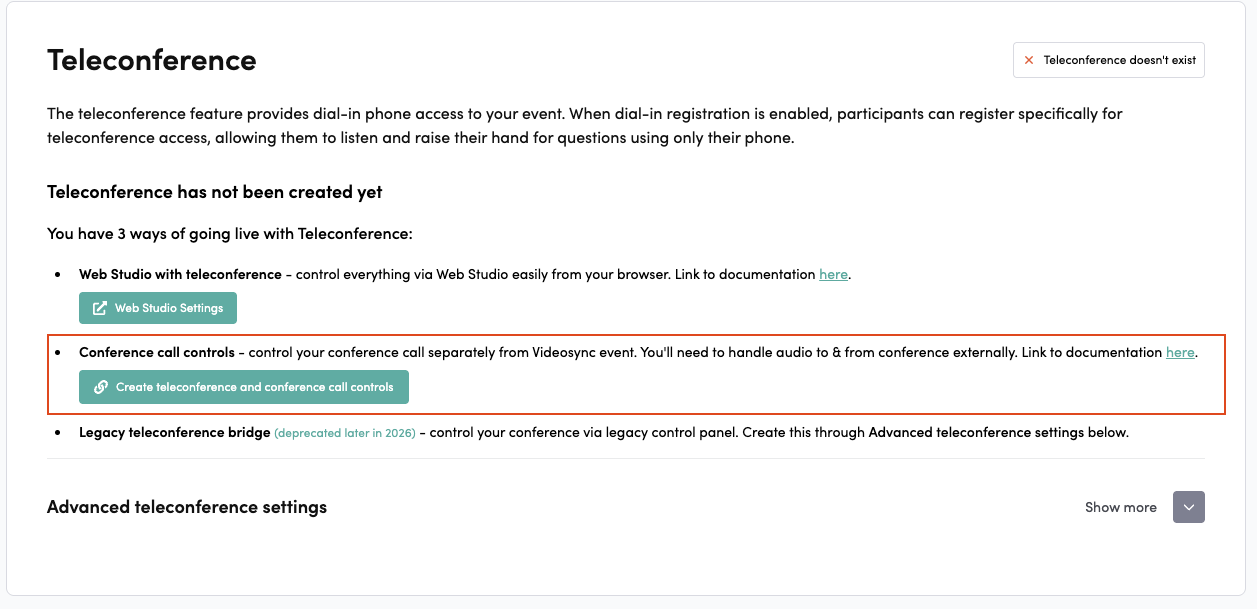
The three teleconference control options available in Videosync
Conference Call Controls provides a dedicated interface for managing conference call operations independently from your event. The tool allows you to control (start/stop) conference call operations separately from the event itself. This gives you three essential control buttons to set up, start, and end conference calls with a specialized interface.
Key difference from Web Studio with Teleconference: You need a separate RTMP stream for your webcast/audiocast and you need to handle routing audio to/from Conference call controls on your side (with required mix-minus).
To edit the dial-in registration page or configure dial-in numbers, see How to Edit Dial-in Registration Page.
Accessing Conference Call Controls
To access the Conference Call Controls interface:
-
Navigate to Event Admin → Live → Teleconference
-
If you don’t have Web Studio with teleconference created, click Create teleconference and conference call controls
-
Locate the Conference call controls section at the top of the page
-
Copy the link to your clipboard or open it from the external link icon
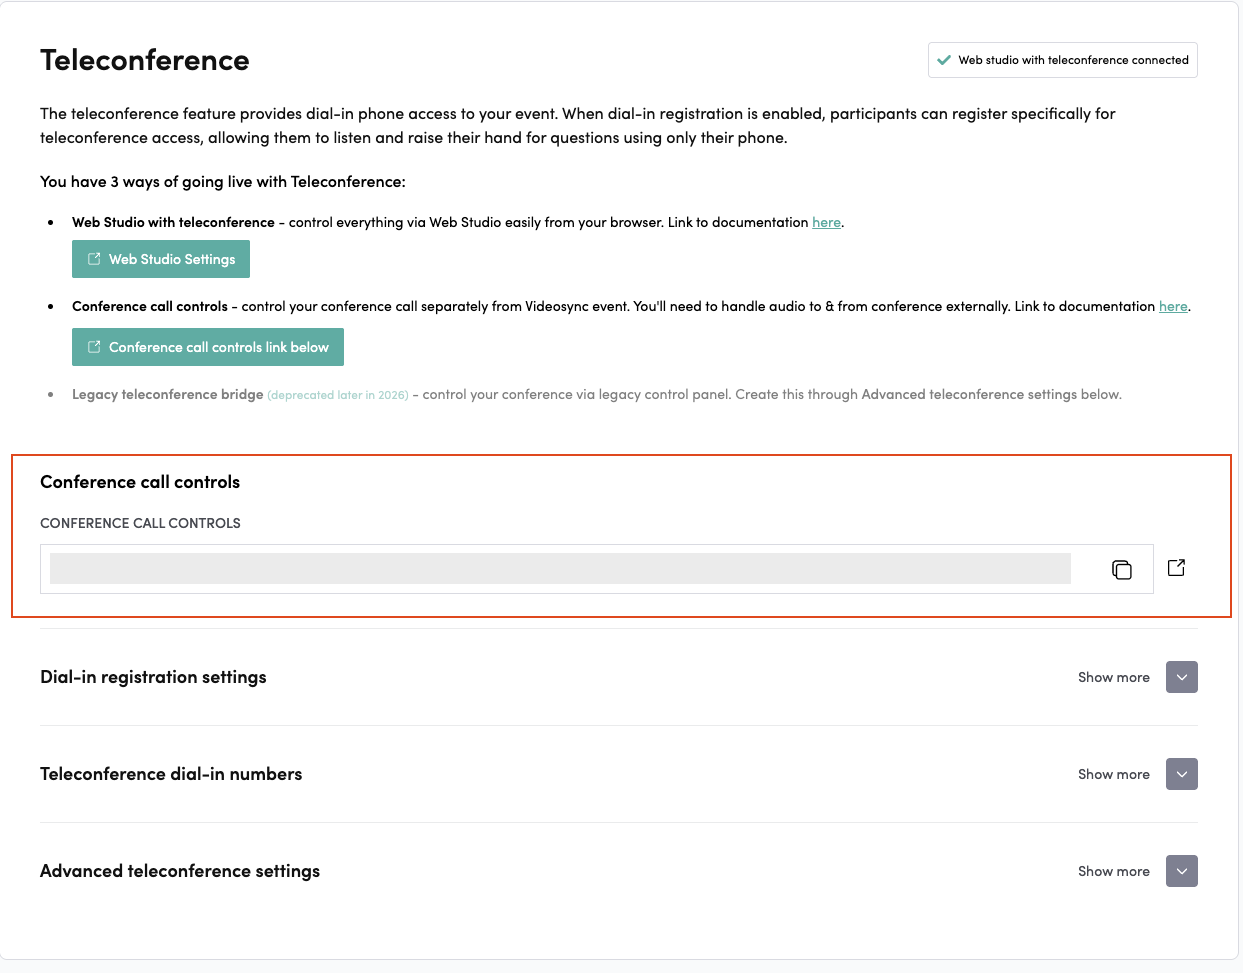
Accessing Conference Call Controls from Event Admin
The Control Interface
The Conference Call Controls interface displays three main control buttons:
- Set up conference call - Prepares the conference call bridge
- Start conference call - Makes the conference live
- End conference call - Terminates the active conference for all participants
These buttons become active or disabled based on the current state of your conference call, ensuring you can only perform valid actions.
Setting Up the Conference Call
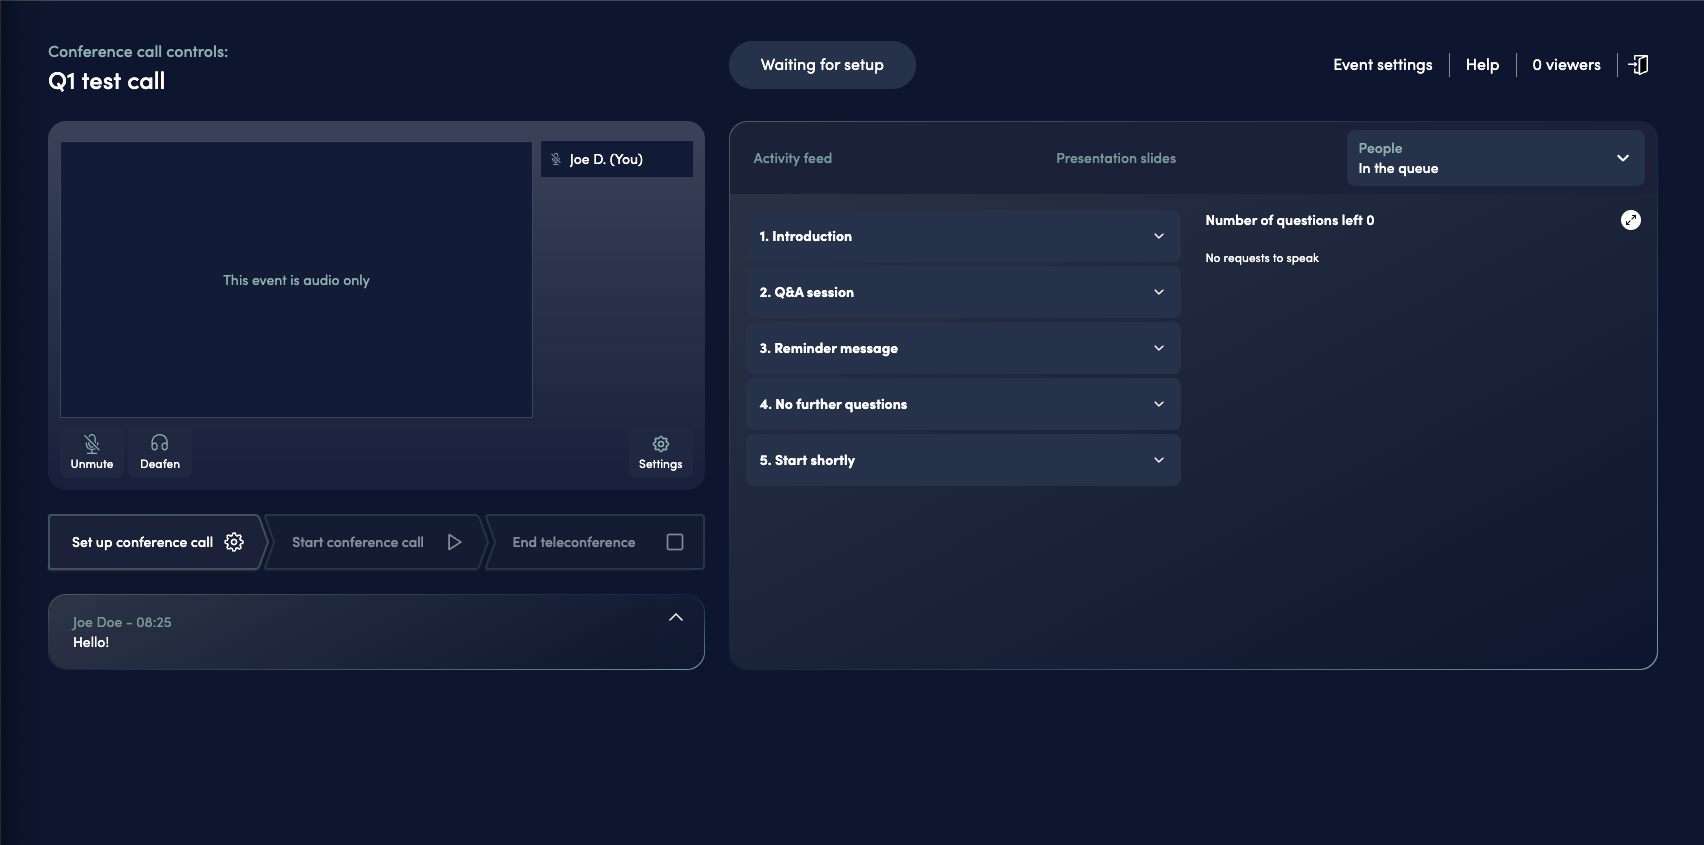
The Conference Call Controls interface
Before you can start a conference call, you must set it up:
-
Click the Set up conference call button
-
The button will display Setting up conference call… while the system connects the conference call bridge to your Web Studio
-
Once setup is complete, the button changes to Reset setup. The virtual host and SIP bridge/phone bridge will now appear, and you’ll be moved to the pre-conference room
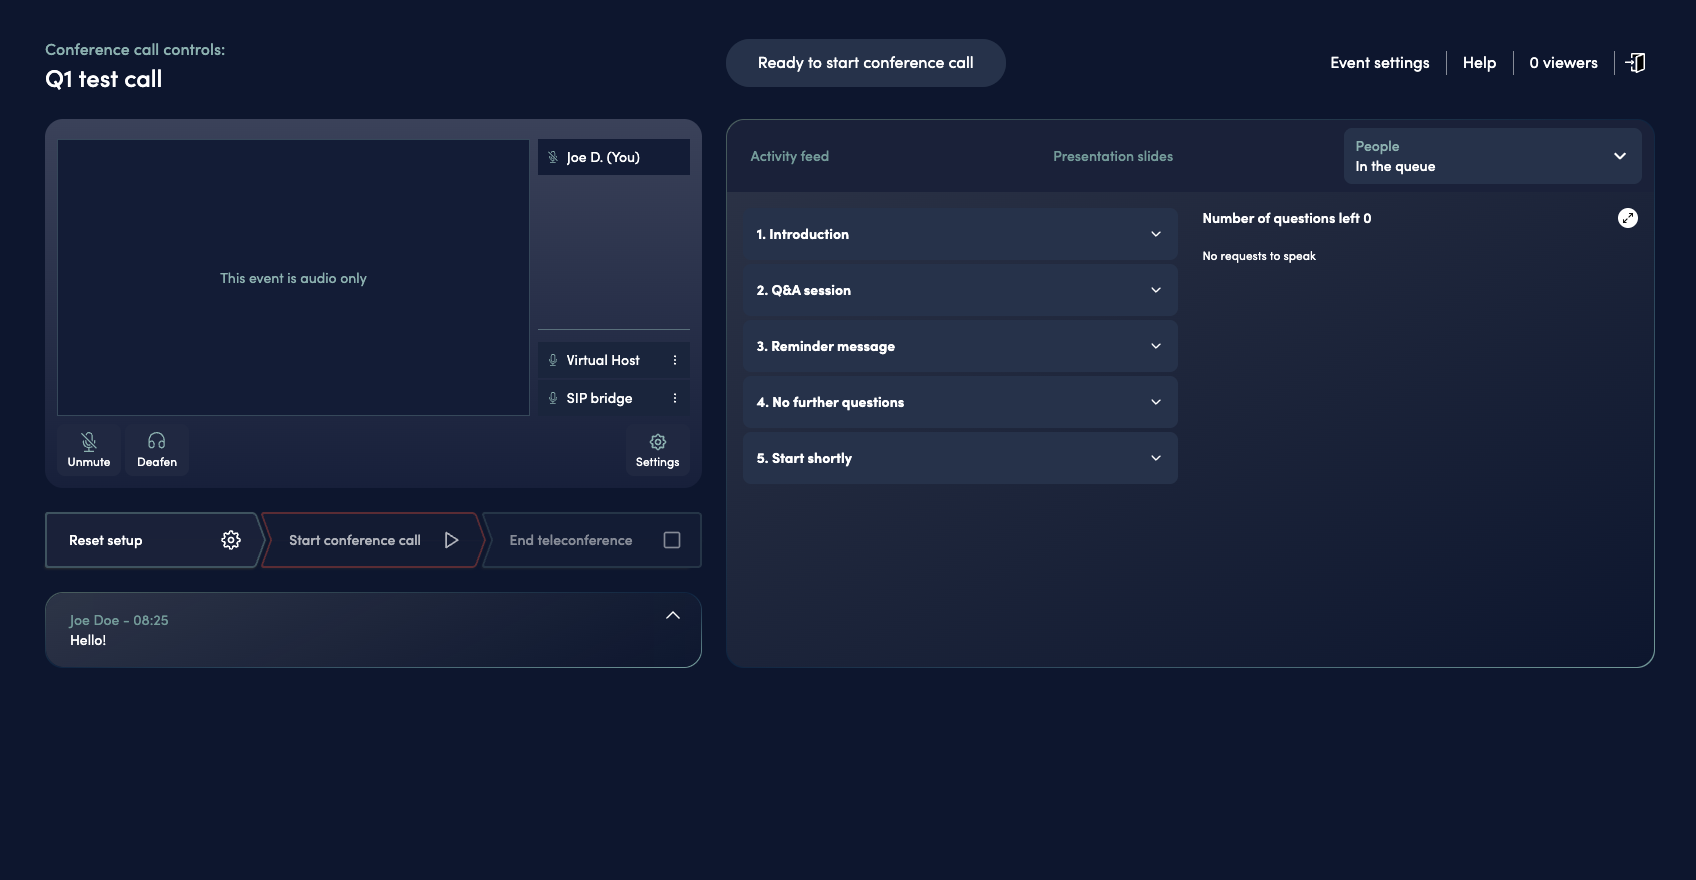
Conference call in pre-live setup state
**In setup conference call state you are not live yet but you can already test your setup privately. You see “SIP bridge” and “Virtual Host” in UI when setup is ready and connections are active.
In setup you can
- Test text-to-speech announcements (found under People → In the queue)
- Test phone line audio before starting the live conference (see below)
Testing phone line audio
Testing your connection through the People tab
To test the conference call connection before going live:
-
Register for dial-in access:
- Go to your conference call dial-in page
- Register to receive dial-in credentials
-
Dial in to the conference:
- Call the phone number provided on your dial-in page
- Enter the conference ID when prompted
- Enter your user ID when prompted
-
Raise your hand:
- Press #5 on your phone keypad to raise your hand
-
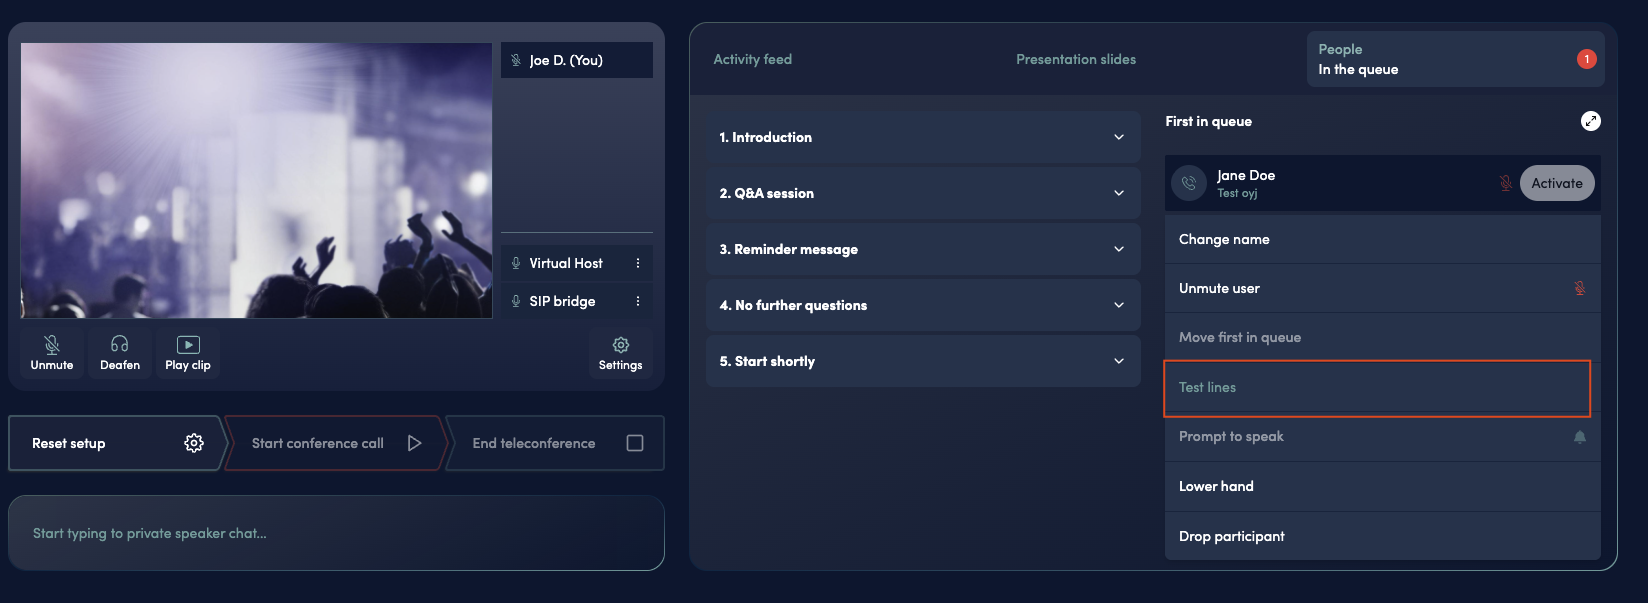
Access test lines:
- You will appear in the People tab list in Web Studio
- Click on your name in the list to open a menu
- Select Test lines from the menu
- This moves you to the pre-conference room where you can test your audio connection
- You can move back to the main conference by clicking your name again and selecting Stop testing from the same dropdown menu
Resetting the Setup
If you need to reconfigure your conference call setup:
-
Click Reset setup (only available after initial setup)
-
The button displays Resetting conference call… while it disconnects the conference call bridge and returns to the initial setup state
-
After reset, you can click Set up conference call again
Important: Resetting the setup will remove the conference call connection (SIP/phone bridge) and the virtual host from your Web Studio. Reset setup returns Conference call controls to its initial state but it does not terminate the calls for waiting phone participants.
Starting the Conference Call
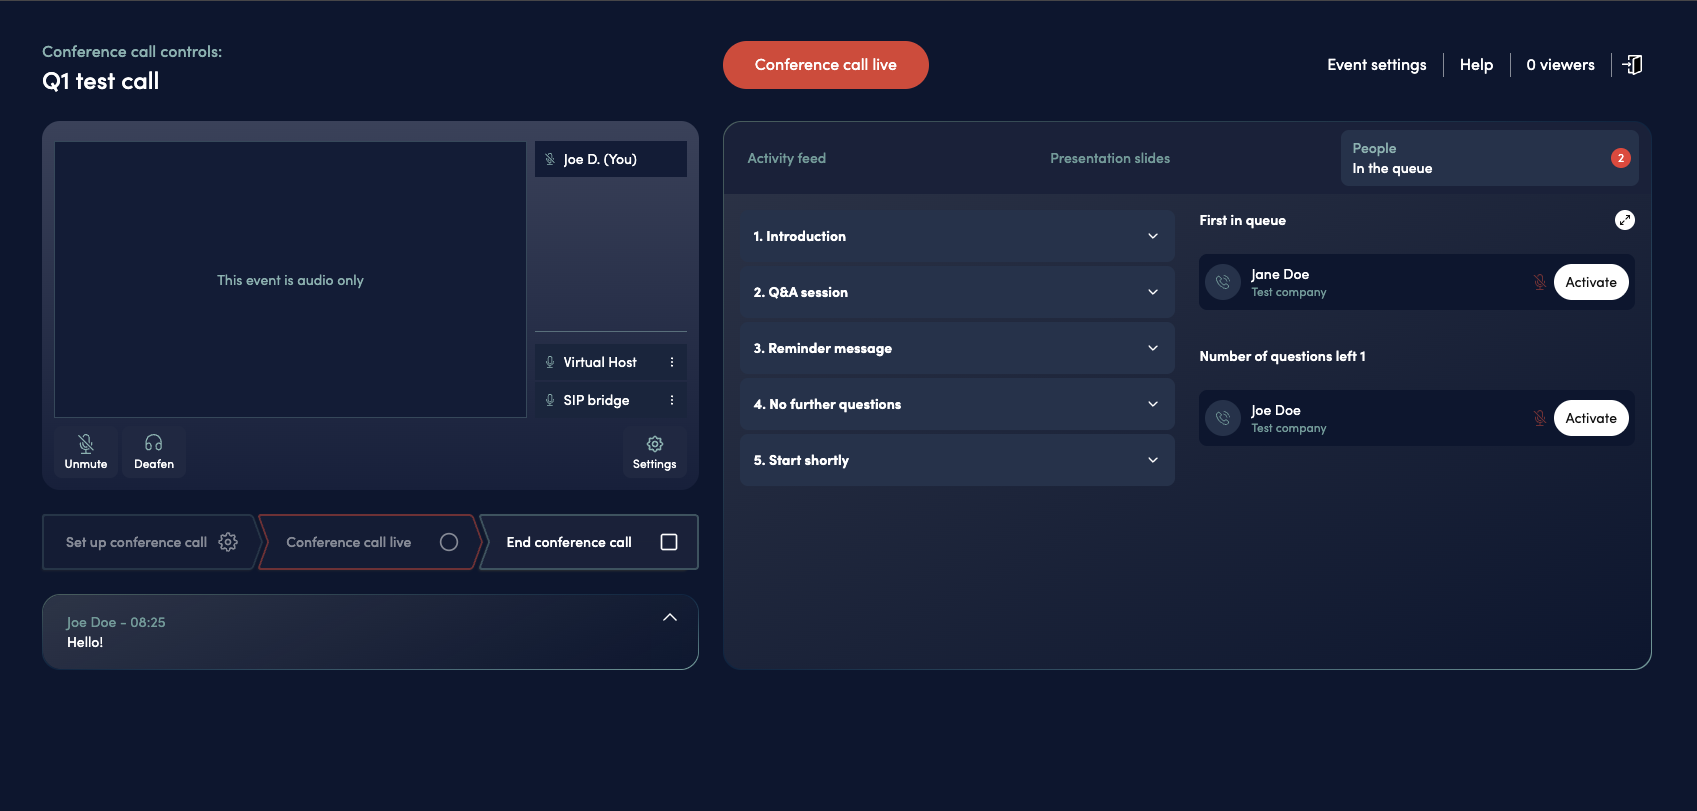
Conference call in live state
Once setup is complete, you can start the conference call:
-
When you are ready, click the Start conference call button
-
During activation, you’ll see Starting conference call…
-
The conference call is now live — listeners on the line will be able to hear you
When the conference call is live, participants who dial in to your conference call numbers will be connected to the active call.
Managing Participants: You can control conference call participants through the Web Studio People tab. When participants raise their hand, you can:
- See them listed under “Raised hands” in the People tab
- Click Activate to unmute their microphone (conference call participants are activated immediately)
- Use the virtual moderator to automatically announce their name and company
For detailed instructions, see the People: Raised hands from Talkback and Conference Call section in the Web Studio streaming guide.
Ending the Conference Call
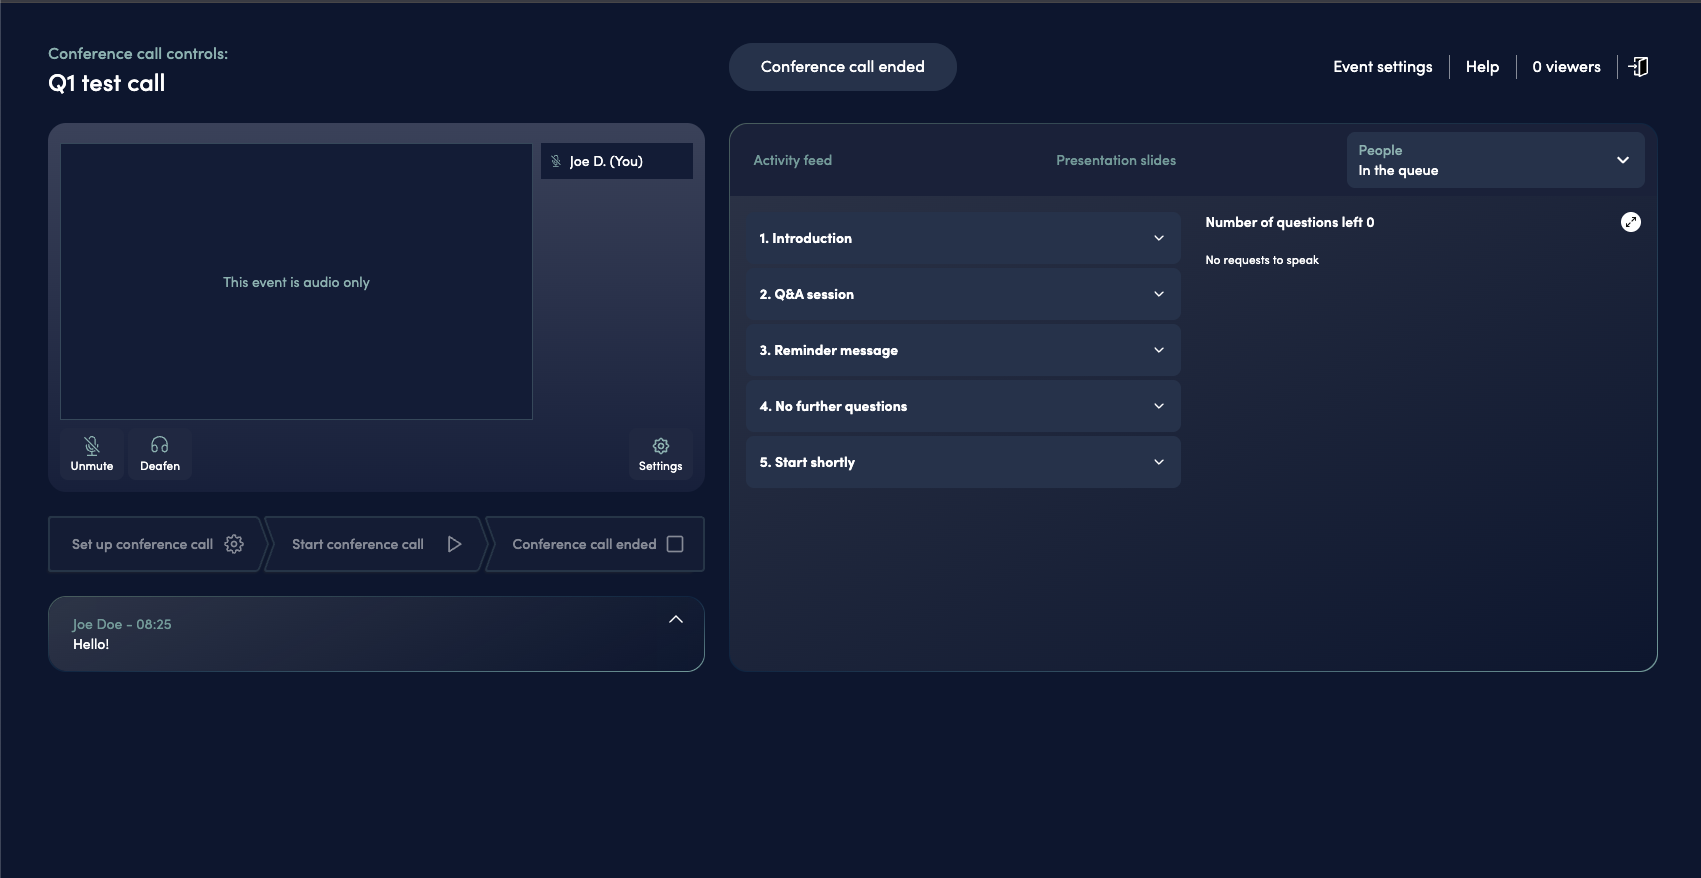
Ending an active conference call
When your event concludes or you need to stop the conference:
-
Click the End conference call button (only enabled when conference is live)
-
The button shows Ending conference call… while the system:
- Disconnects all active conference call participants
- Stops the conference bridge
- Returns to pre-setup state
-
After completion, you’ll see Conference call ended
After ending the conference call, there is a small timeout period. Once this timeout completes, you can start a new call if needed by clicking Set up conference call again.
Best Practices
- Test Before Live: Use the Conference Call Controls to test your setup before your actual event starts
- Reset When Needed: If you encounter issues, use the “Reset setup” function to start fresh
Troubleshooting
Button is Disabled
If a control button is disabled (grayed out), it means that action isn’t valid for the current state. Follow the sequence: Set up → Start → End.
Setup Fails
If setup fails:
- Verify your conference call bridge is properly configured in Event Admin
- Check that you have admin permissions
- Try refreshing the page and attempting setup again
Cannot Start Conference
If you cannot start the conference:
- Ensure setup completed successfully (button shows “Reset setup”)
- Verify you’re using the correct admin URL
- Check that no other errors are displayed in the interface
Participants Cannot Join
If participants report they cannot join:
- Confirm the conference call status shows “Conference call live”
- Verify dial-in numbers are correctly configured in Event Admin
- Check that participants are using the correct dial-in information
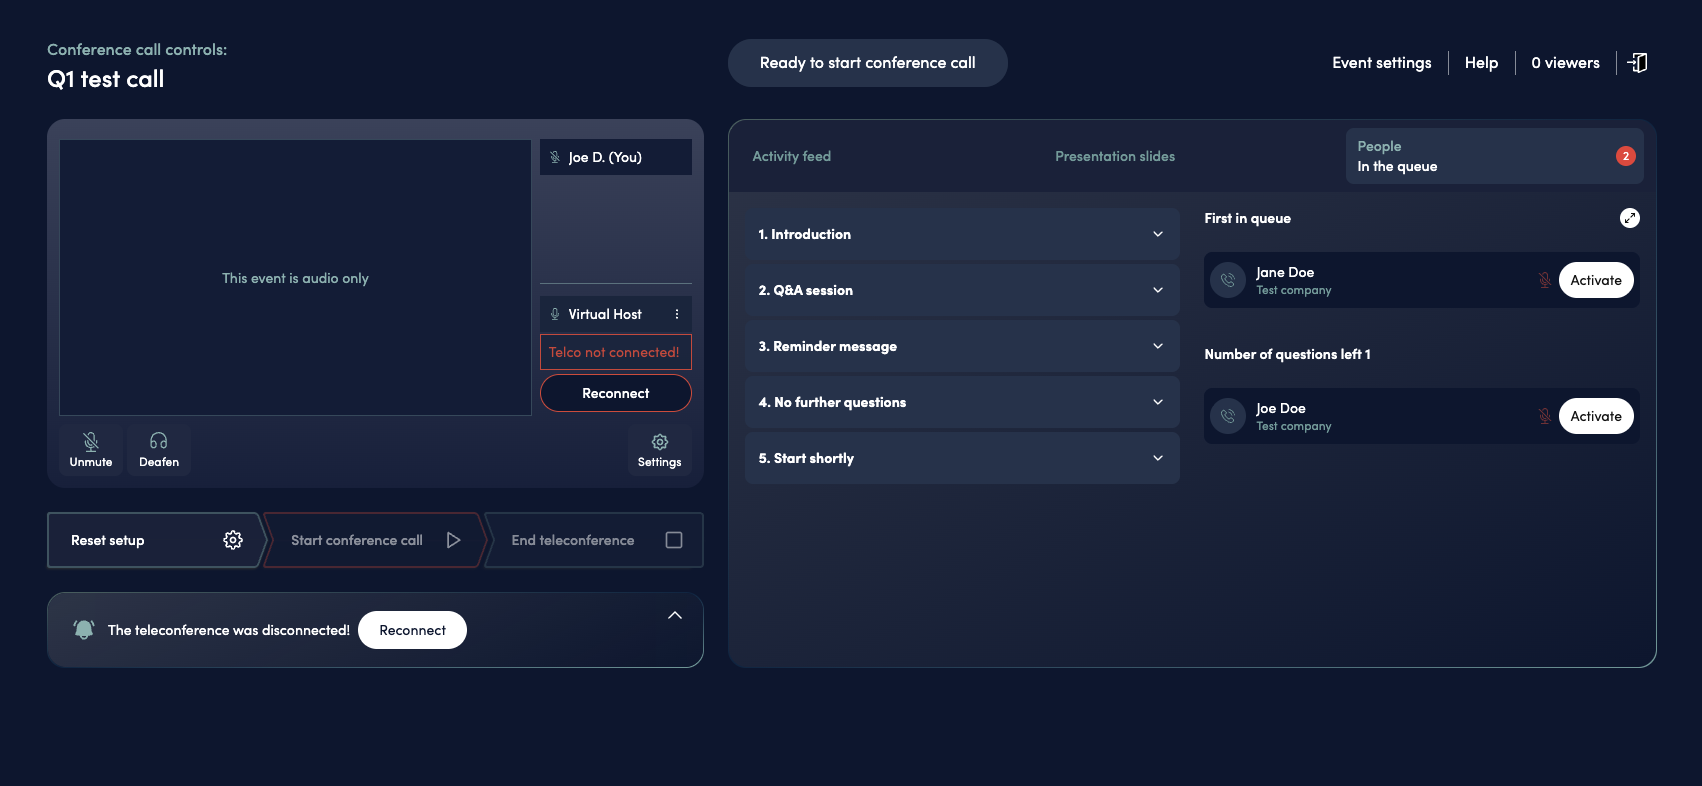
Virtual Host or Bridge Disconnects During Live Call
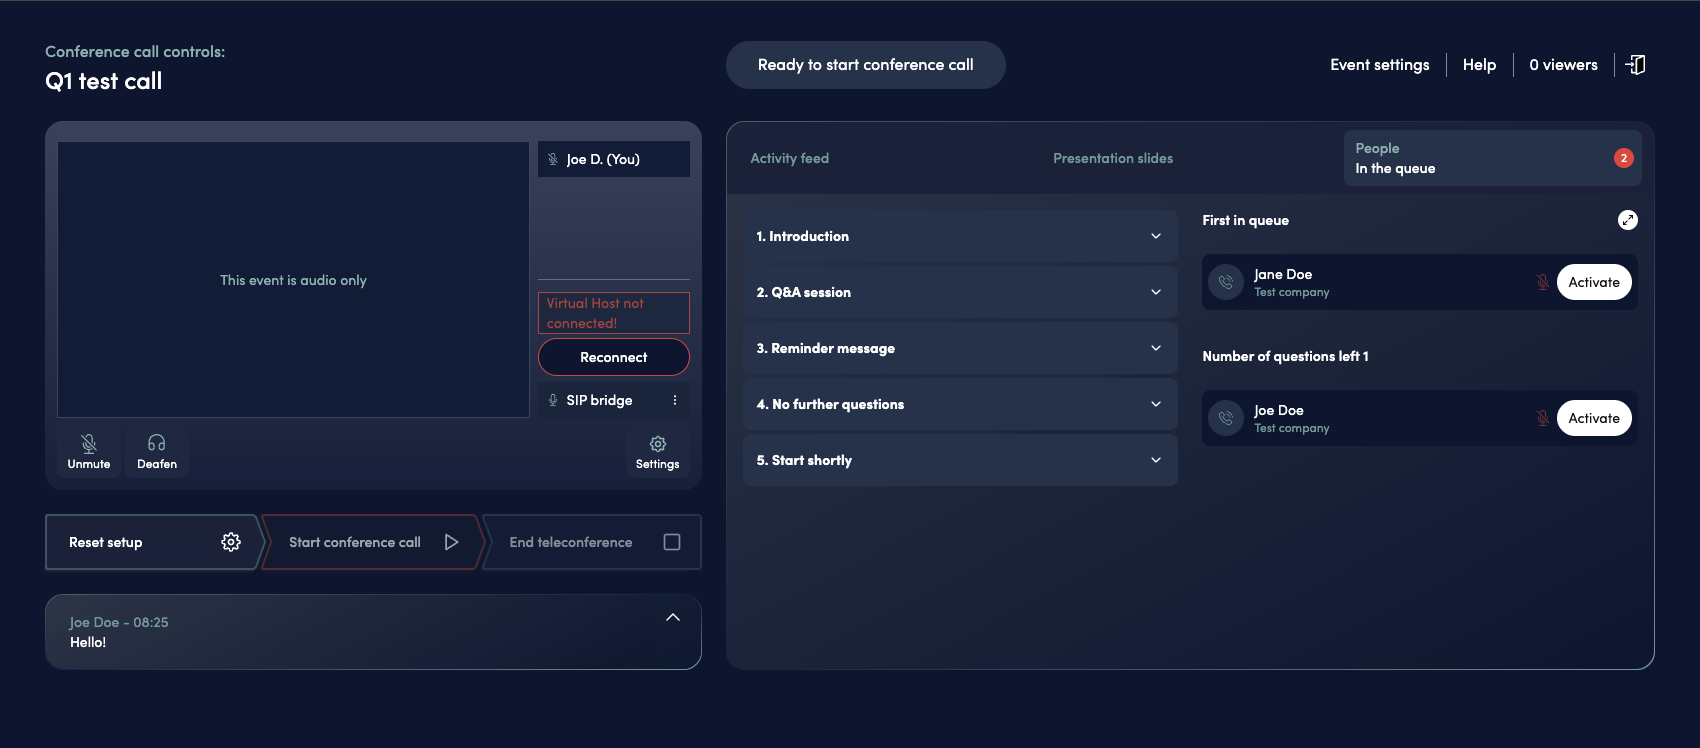
Virtual host disconnected with reconnect option
If the virtual host or phone bridge/SIP bridge drops during a live conference call, you can easily restore the connection:
-
A Reconnect button will appear when the virtual host or bridge disconnects
-
Click the Reconnect button to re-establish the connection
-
The system will reconnect the dropped component without needing to end and restart the entire conference call
Bridge disconnected with reconnect option
This allows you to quickly recover from temporary connection issues without disrupting the entire conference.
Related Articles
- Videosync Conference Call Feature - Learn about basic conference call setup and configuration
- Web Studio dial-out to speakers - Dial out to speakers’ phones from Web Studio